In planning this game I read up on the battle from various sources including Osprey campaign books and 'Overlord' by Max Hastings. I then looked for off the shelf scenarios, first looking in the rules 'Kampfgruppe Normandy' and then the Flames of War supplement 'Villers Bocage'. If you've done a similar exercise and combined it with looking on Wikipedia you'll find that with a broad brush the accounts agree, but the detail can differ quite a bit.
I chose to go with the forces and map in the scenario 'Disaster at Villers Bocage' (Kampfgruppe Normandy) whose forces for both sides are representive rather than 100% accurate. I however decided I was happier with the detail of events in the Flames of War supplement 'Villers Bocage'. I changed the map layout suggested in Kampfgruppe Normandy to have lane link N175 that runs NE from Viller Bocage to road parallel to the the southern side of the board. This represented the lane Wittman used to join the N175 and run down the column of A Company The Rifles towards Villers Bocage.
Game Size
Squad
(KGN has it as a Company sized game but the key factor here is the 1D6 for command activation which equates to a squad level game in Battle Group. Based in points Battle Group would make this a Platoon sized game but I've kept the 1d6 for command to represent the difficulties on the day)
Situation Report
On the 13th June the 4th County of London Yeomanry (CLY) were ordered to take the strategic road hub of Villers Bocage. Securing the town required the hill named point 213 NE of the town to be occupied. This was part of an overall thrust between a gap between the German forces that Monty wanted to exploit to finally open the way to Caen.
The gap had not gone unnoticed by the Germans who pushed forward the 101st SS Schwere Panzer Abteilung and Panzer Lehr to fill it.
The 4th CLY supported by the 1st The Rifles reached Villers Bocage without any opposition. A co CLY set off to recce point 213 spurred on by Viscount Lord Cranleigh in his armoured car. The Viscount left his CLY HQ in the main street of Villers Bocage who dismounted for a meet and greet with the locals. The Rifles A company halted on the N175 road that led to point 213 and also dismounted for a brew while the officers went forward for an Ops group meeting with the Viscount on the hill.
Wittman's small panzer force of 101st SS Schwere Panzer Abteilung watched all this then struck!
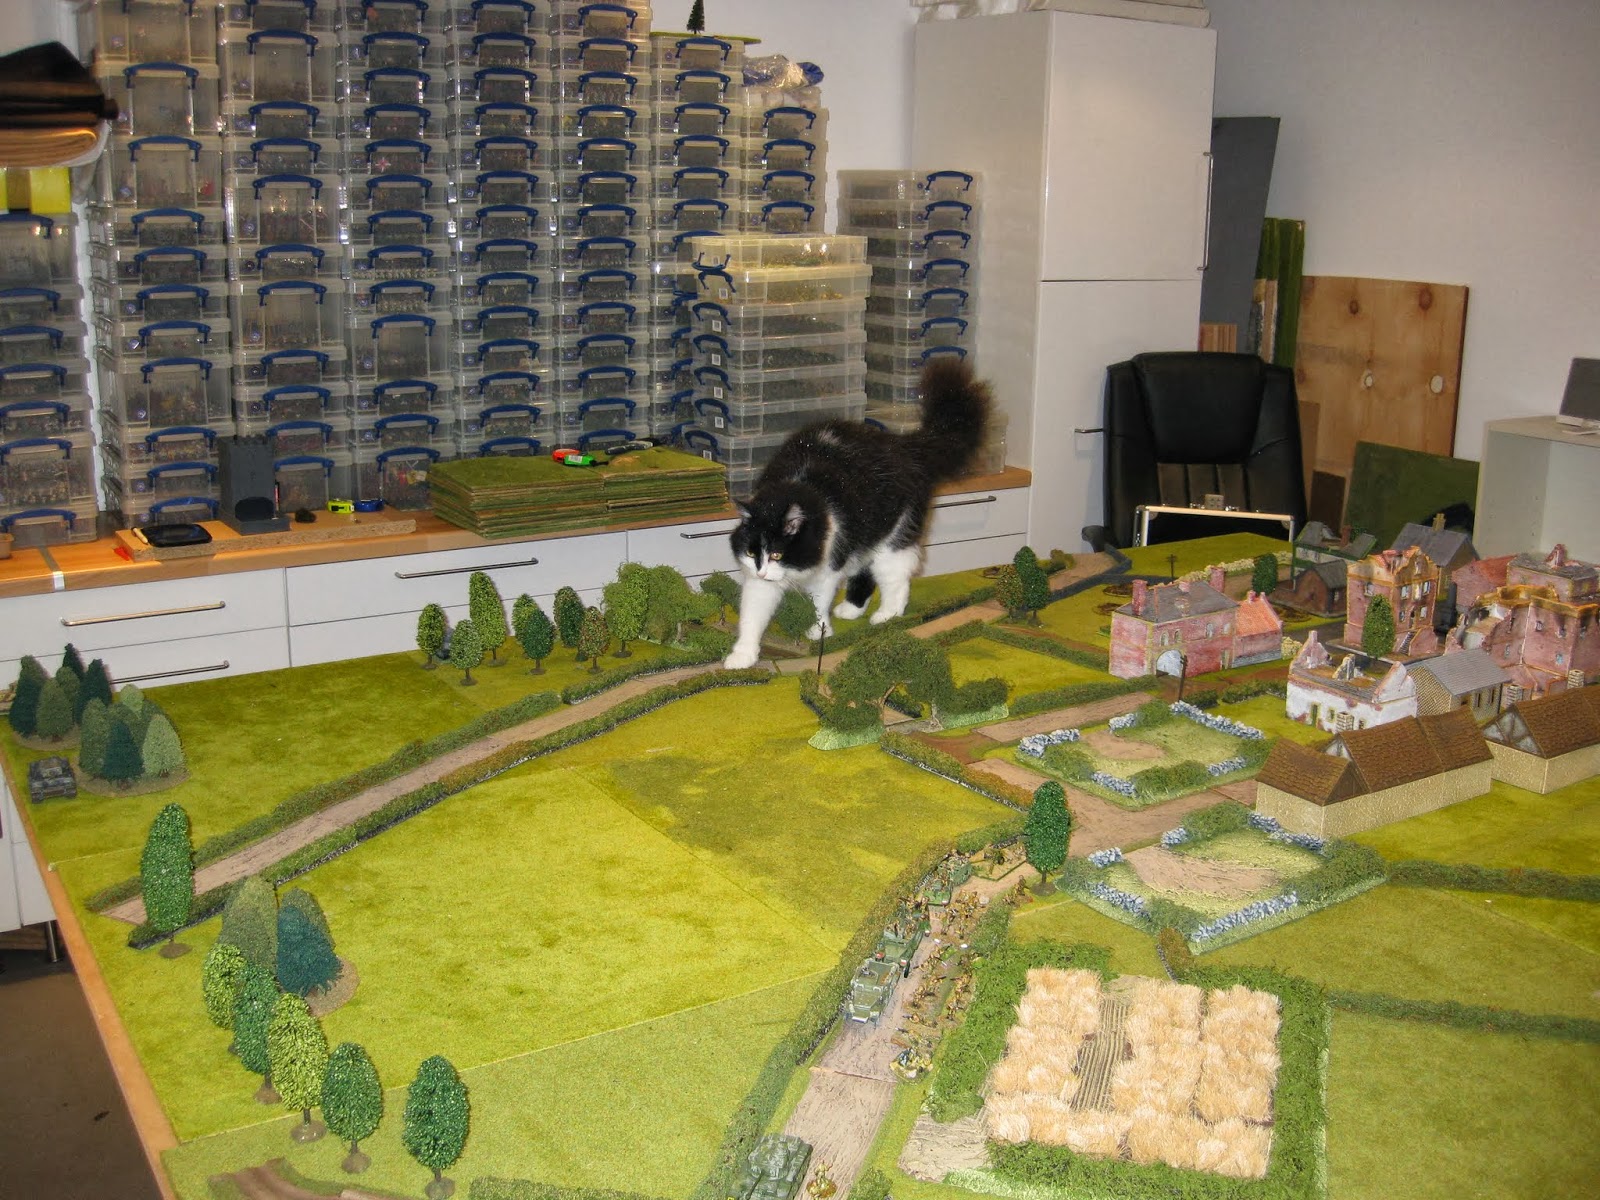
Terrain
6x8ft board, with the long sides being North and South. In the west is the outskirts of Villers Bocage. N175 runs NE as an extension of the main street I set up. Villers Bocage is made of a square which is fed by 3 roads see photo below:
The hedges are not bocage and all the terrain was treated as what you see is what you get using the standard Battle Group rules.
Deployment
Wittman's force could deploy 6" in from the boards edge from the east side, up to the South to North road that skirted the side of Villers Bocage which was approx. 3.5ft from the eastern edge.
 |
| Wittman in the grey Tiger hides with one of his other Tigers in the woods |
 |
| The rest of Wittman's force. A Panzer IV on the left and another Tiger on the right. The supply truck and Pamzer Grenadier squad were reinforcements appearing in turn 4. |
 |
| The Panzer IV on the North South road |
In Villers where the HQ squadron of Cromwells and a Half track representing attached staff e.g. the Medical Officer and the RAF FO.
 |
| Villers Bocage |
A Co The Rifles lined the N175 starting from the junction of the North South road. The rear of A squadron CLY straddle the farm lane junction with the N175.
 |
| A Company The Rifles having a brew |
 |
| General Maxipuss arrives to survey the British deployments. 4th CLY HQ on the main road in Villers Bocage was checked first. |
 |
| All looks Ok to Max in Villers square |
 |
| The north south junction with the N175 passes muster |
 |
| General Maxipuss declares the British deployment meets the deployment instructions and moves on to the Germans |
 |
| Max reviews the Tiger on the road and it's mate behind the wood. General Maxipuss would like to point out that the supply truck and squad of SS placed in the woods do not activate till turn 4. |
 |
| Max strolls up the secondary road. |
 |
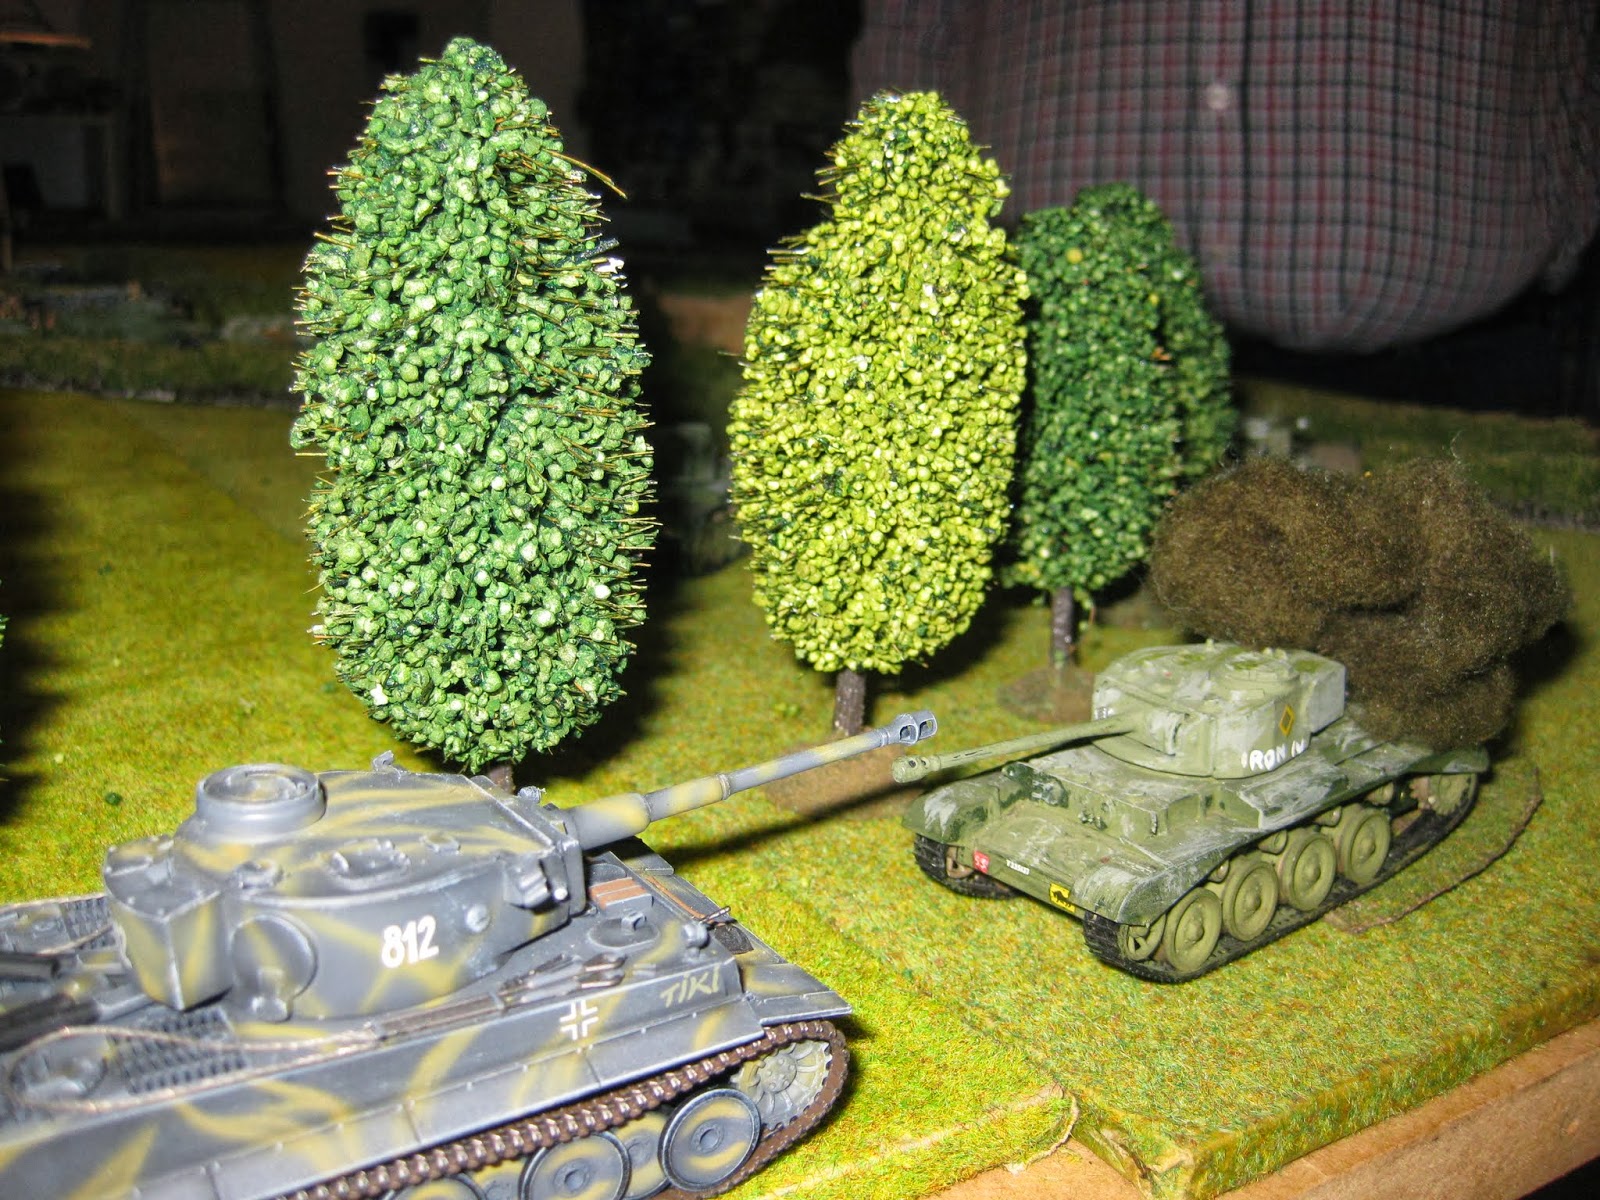
| Wittman and friend have been discovered |
 |
| Yep, definitely a Panzer Ace here |
 |
| Viller Bocage and the square with part of the CYL HQ parked for a brew and meet and greet with the newly liberated locals. |
 |
| Max looks towards A co The Rifles on the N175. |
 |
| Max confirms there is nothing to see on this side |
 |
| 2nd review of Viller Bocage |
 |
| You can start playing now I'm done |
 |
| Villers Bocage main street with elements of CLY HQ |
 |
| Villers Bocage square with elements of CLY HQ |
 |
| CLY HQ troops natter over tea |
 |
| Villers Bocage from the East |
Objectives
Wittman's objective is to break the British force
The British objective is to not let him and do the same to the Germans.
Special Rules
The British have no officers to increase their command roll score, so they only have 1d6 to activate their units.
Wittman is a Panzer Ace as per the Battle Group riles. The KGN scenario didn't have this but Battle Group does and it had to be done. Panzer Ace made Wittman an elite for morale and he gained a plus 1 to hit.
German reinforcements arrive turn 4
British can begin rolling for B squadron CLY from turn 2. A 6 sees them arrive anywhere on the western board edge.
Forces
British
Points:717 BR:44 Officers:0
NE edge of board on N175 road:
A Squadron City of London Yeomanry
A Co The Rifles represented by:
2 squads of infantry in half tracks, 6pdr AT and tow, PIAT in Bren carrier, HMG in Bren carrier and Supply truck
Villers Bocage:
HQ Squadron City of London Yeomanry
From turn 2 on a 6 using a D6:
B Squadron City of London Yeomanry
Germans
Points:418 BR:19 Officers:1
SE board edge:
Tiger 1 Wittman, Panzer Ace (senior officer)
Tiger 1 x 2
Panzer IVH
Reinforcements Turn 4:
Veteran Panzer Grenadier squad with 1 Panzerfaust and MMG
1 x Supply truck
Battle Report
Turn 1
The Germans went first and subtly went direct for the Rifles' column.
 |
| Wittman bottom right reaches the entrance to the farm lane leading to the N175. Historically he travelled up this lane and took put the rear elements of A squadron blocking the road to point 213 then destroyed the infantry company vehicles. |
 |
| View from the German deployment area showing the advance towards the unsuspecting British. |
 |
| The Panzer IV starting on North South road cautiously approaches the outskirts of Villers Bocage. |
 |
Not having enough movement the Tiger stops before the hedge and takes a shot and misses.
|
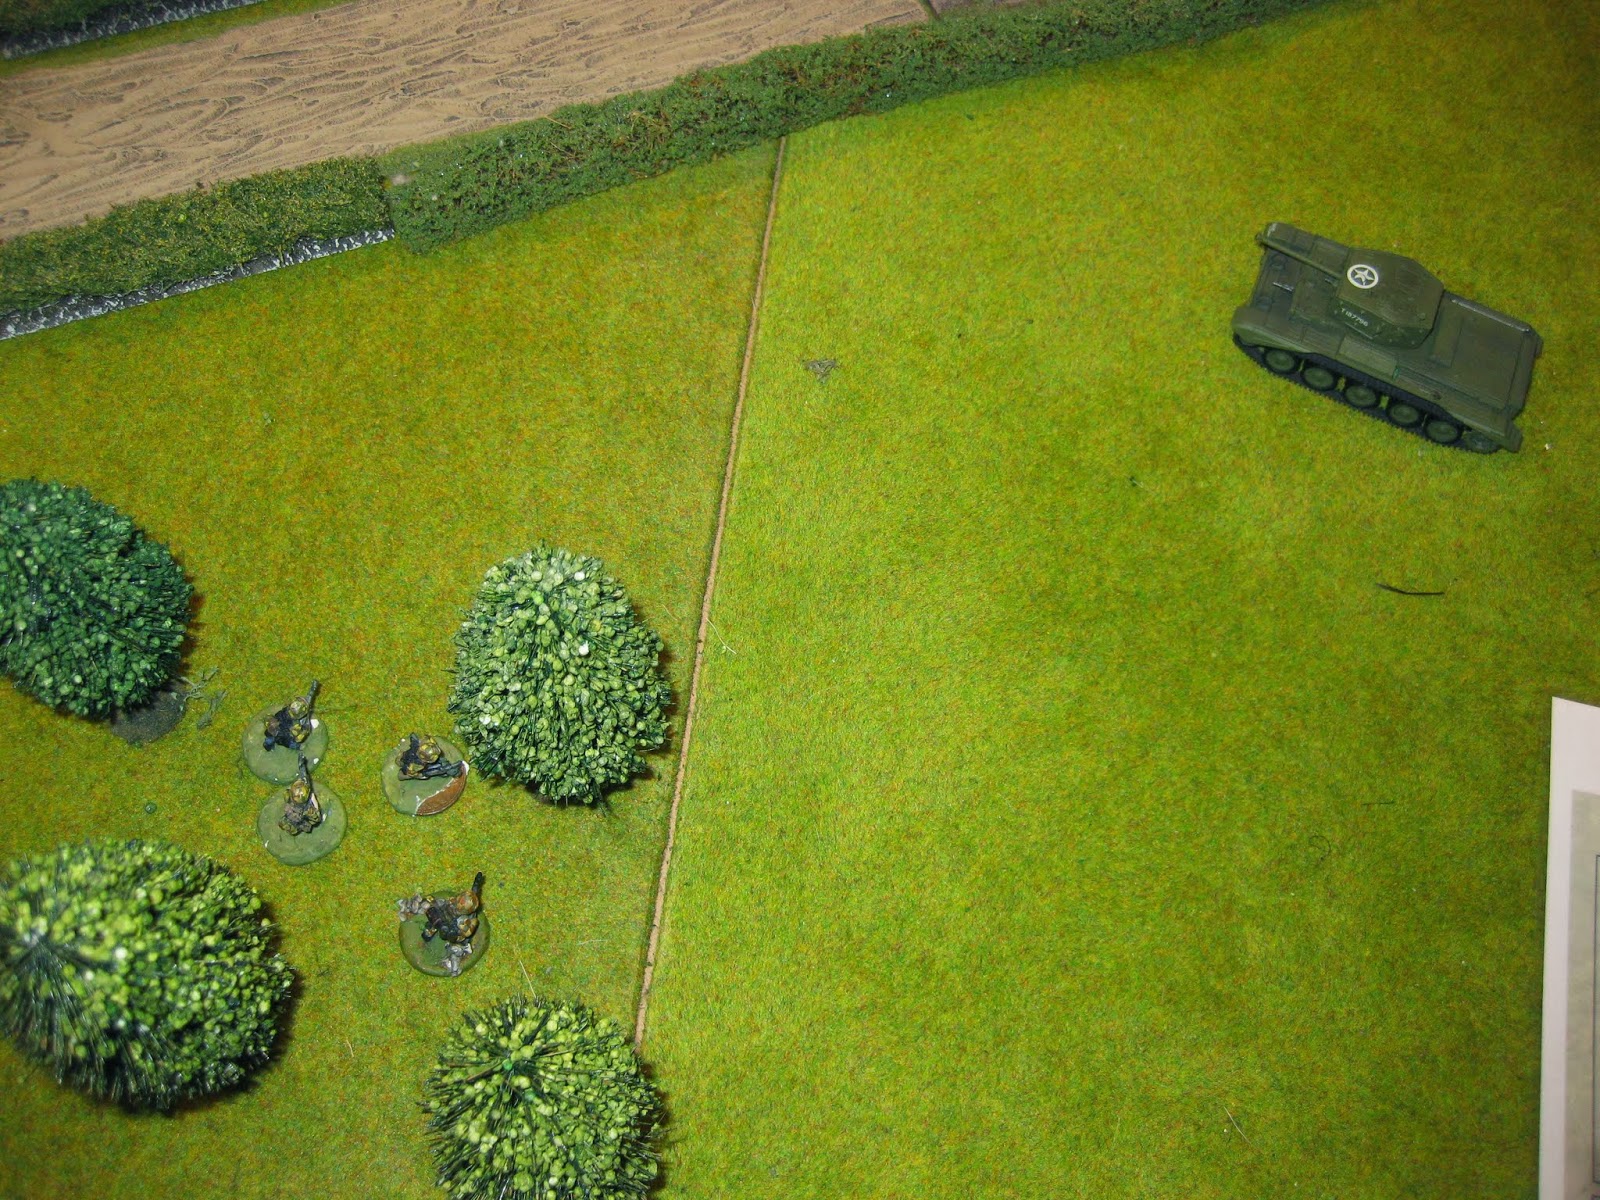
Alerted by the whish of a passing shell the Rifles slowly reacted and managed to unlimber the 6pdr. Others scrambled for cover.
Turn 2
The Germans continued to advance with a combination of 'fire and move' or 'move and fire' orders.
 |
| The Panzer IV moves across the cross roads and halts as the result of the 6pdr's ambush fire (let last turn). The Tigers cross the hedge. The grey Tiger moves to support the Panzer IV and the yellow Tiger not fitting in the road to face the British turns to its side. All German tanks open fire. All German tanks miss. |
 |
| Wittman took a side shot and misses and then misses again with his re roll (groan) |
 |
| The Rifles continue to seek cover |
 |
| The rear guard of A squadron reacted to the sight of Wittman and moved rapidly to close and attempt to disable him. 2 pings later Wittamn is rattled but still in the game. |
 |
| The Rifles 6pdr took aim and killed the first Tiger. 1st Battle Rating token (BR) taken by the Germans. The average token score is 3 so the Germans just need to be forced to take approx. 7 tokens to break. |
 |
| The Brits feel this is worth a photo |
 |
| .... and another |
 |
| ... and lets photo our surviving tanks, which is all of them because the Panzer Ace can't hit the side of a barn! |
 |
| A squadron closing in on Wittman |
 |
| The Firefly hangs back to cover A squadrons' flank |
 |
| The majority of A company find cover behind the hedge |
 |
| The HMG section are not so lucky and are still in the road tripping over themselves as they gather their kit |
 |
| The 6 pdr takes another shot at the Panzer IV and misses. |
 |
| Mexican stand off |
Turn 3
 |
| Wittman fires first ... |
 |
| ... and scores as the cheeky Cromwell (Comets were used as stand ins) goes boom. BR token for the Brits. Using 3 as the average token value the Brits need to forced to take approx. 15 tokens to break. |
 |
| The grey Tiger moves into the field and takes a long shot to support Wittman and misses |
 |
| The Panzer IV returns fire on the 6 pdr and pins it. |
The British opt to take a BR token to remove the pinning action on the 6 pdr. That theoretically leaves 12 more tokens to be taken before the Germans can declare a victory.
Turn 4
The Germans receive their reinforcements gloating that the British have yet to roll a 6 to bring B squadron on. The Germans also begin making the Brits take BR tokens by radically improving there dice rolling to hit and then penetrate the British armour with a high enough d6 roll to destroy them.
 |
| The grey Tiger in the field takes out 2 bren carriers. Leaving the Brits with approx. 10 tokens to take. |
 |
| Wittman fires twice rolling appalling dice saved by his Panzer Ace ability that destroys a Cromwell flanking him. 9 tokens left to the Brits. In revenge the final Cromwell of A squadron moves and fires in to the rear of Wittman and stops his 'wild ride' before it begins. Not only do the Germans take a token, leaving approx. 5 left, they lose their officer bonus to the command role. |
 |
| While the Germans are in shock the 6 pdr having survived the Panzer IV's shots returns the favour with more success endings it game. 1 more token for the Germans, leaving them a 4 tokens left statistically. |
 |
| The German positions are improved greatly by the HQ squadron managing to man a Cromwell and send it forward coming up behind the Germans |
Turn 5
Turn 4 was not a good round for the Germans. The veteran Panzer Grenadiers move up to support the remaining tank. German shooting is once again shocking with no hits.
 |
| The British take advantage of ..... their advantage, and the Germans poor performance and begin moving the vulnerable vehicles out of sight. |
Turn 6
The last Tiger standing has more success this turn and another bren carrier is destroyed. 9 tokens left for the Brits.
 |
| Smelling blood the CLY close in moving the Firefly down the column near the 6pdr and Cromwell from the East and one from the West. After a few pings they manage to pin it. |
 |
| HQ squadron Cromwell scores the pinning hit |
 |
| Another view |
 |
| The 6pdr and Firefly |
 |
| The brave Rifles ensuring no easy scores for the Germans |
 |
| The 6pdr can't see the last Tiger |
 |
| Nor can the Firefly unless the Tiger moves, which it would need to get the last bren carrier |
 |
| Wider shot to see the Cromwell coming in from the East. |
 |
| Did I mention Wittman lost his Tiger |
Turn 6
Nice and quick turn. The Panzer Grenadiers being the only offensive unit left move to get a shot at the eastern Cromwell, but it's just out of range. As a final act of the German move they take token to remove the pinned status off the Tiger. Statistically 4 tokens left for the Germans, in reality once this Tiger goes I vote for the Grenadiers to slip away through the woods.
 |
| The panzerfaust moves in to position and discovers it's out of range. Drat. The good news is poor command dice limit the British actions and then the Brits can't score a hit on the Tiger. |
 |
| The Western Tiger is given the honours of 2 shots and the unlucky Tiger is pinned again. |
 |
| The Eastern Cromwell shoots up the Pannzer Grenadiers and pins them |
Turn 7
The panzerfaust is the only offensive weapon once again, but having learnt they were out of range last turn they creep forward slightly...... and miss. That was then end of that one shot wonder weapon!
The Germans then take a token and roll for the number of units pinned and free up the Tiger and the infantry. 3 tokens to go.
 |
| Whoosh and drat and double drat |
 |
| The Western Cromwell zooms up and takes a point blank side shot and is rewarded with a satisfactory bang. |
 |
| The final action for the Germans is that the token they pick causes the Eastern Cromwell to break down. It however can still shoot and pins the Panzer Grenadiers. |
 |
| Game over |
 |
| The victorious Cromwell from HQ squadron |
 |
| Definitley a medal for this crew |
 |
| The surviving bren carrier with flash |
 |
... and without
|
Review
Great scenario. Lots of tension. Definitely will play this again, and with the benefit of hindsight I do in a forthcoming post.
Lessons learnt, was an old one which was I suck at dice rolling.