Merry Christmas all,
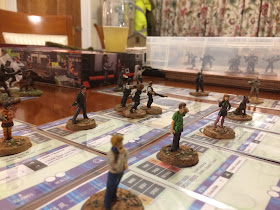
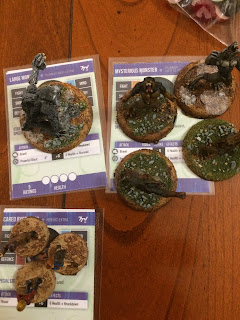
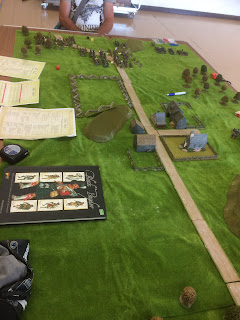
Santa was extra generous this year as the house is almost finished and I’ve started a new contract. He filled my stocking(s) with the latest waves of XWing, Hasslefree’s post apocalypse Mystery Inc gang, some Napoleonic General de Brigade scenario books from Caliver, and Battlegroup Market Garden from PSC. All to spur me on to get the gaming tables built now that the last room in the Wargaming Eyrie has been carpeted.
Now I’m off to tackle today’s challenge of booking tickets for the family to see the latest Star Wars. 2D or 3D?
Musings and ramblings of a wargamer who has decided to share my many photos of games played, shows visited and places of interest I've been too. I will first get all the photos loaded then I'll revisit and write up my notes, or more likely delve my memory. Plus over time I also want to write up scenario details of the games I've played and share new gaming ideas.
Tuesday, 26 December 2017
Saturday, 23 December 2017
Conwy Wargames Club October WW2 Coastal Naval game
Mel hosted a Med game with the Italians escorting a convoy and being attacked by the US and British navy
Sunday, 22 October 2017
Conwy Wargames Club September 15mm DBMM game
Our other club game in September was put on by Ian S and involved a clash between Romans and Carthagians using the DBMM rules.
Pete and Gaz commanded the Carthaginians while Chris commanded the Romans.
I didn't play this but the chaps enjoyed this more than DBM. Gaz who had played Hail Caesar actually preferred DBMM.
Pete and Gaz commanded the Carthaginians while Chris commanded the Romans.
 |
| The Carthaginians |
 |
| Close of the Numbian cavalry |
 |
| Elephants lead the way to hold the bridge |
 |
| The Carthaginian commander |
 |
| The might of Rome |
 |
| The Roman commander positions himself on a hill to see his forthcoming victory (he hopes) |
 |
| Ready for the off |
 |
| Romans making good use of the road |
 |
| Harsh language over the river, which is fordable |
 |
| A clash of titans |
 |
| The Romans struggle to cross the river |
 |
| The elephant holds the bridge to the end (I suggested dicing for the bridge breaking under the weight of the elephant but this was ignored!). Rome fails to capture the crossing, and Carthage wins. |
Sunday, 24 September 2017
Conwy Wargames Club September WW2 Coastal Naval game
Mel hosted a WW2 naval game using his ships and using some rules from the US called Flaklighter 2.
We hadn't played the rules before so we were all interested to see how they would work. I hadn't played this kind of naval at all, and the our experienced players hadn't gamed WW2 coastal for 3 years.
The scenario was simple the German schnellbootes were to attack the British convoy and the mixed Royal Naval and US Navy force were to stop them.
I played the Kriegsmarine, Dave the Allied interception force and Tony controlled the convoy.
 |
| My German S boats |
 |
| The convoy is on the left and the interceptors on the right. |
 |
| My force bottom right |
 |
| Tony's armed trawler |
 |
| And we're off. The template is for turn circles |
 |
| My loner charger also turned away but too little too late. Reduced to half speed it couldn't get away fast enough and was shot to pieces and sunk. It's sacrifice letting the others escape. |
 |
| The end of the action |
I enjoyed the game. I haven't played naval games for decades, the closest I've come to it is playing Full Thrust space combat and that was a few years ago. To do the rules justice we'd need to play them a lot more. Personally I'd need to translate all the measurements in knots/yards to the playable value in inches. I wrote these down as we went along - using the true values gave atmosphere but as it was all new we were constantly converting them to fit what we were measuring on the table. In the heat of action some players did get confused with 10 knots = 10" when they should have been moving 3.33".
The experienced players were not won over by these rules. It was decided that the next game we'd use a more familiar rule set and compare them with these.
Friday, 22 September 2017
Conwy Wargames Club August 15mm ACW Black Powder game
Dave hosted a 2 board game set in 1863. Both boards were side by side with each game having the option to enter troops on to the other board. Once this was done those troops came under the command of the players on that board and appeared during their turn. This avoided issues such the games moving at different speeds.
The scenario saw the Confederates tasked with taking a Union fort. We used the Black Powder rules with the Glory Hallelujah amendments.
Board 1 saw Mel, and Ian command the Union relieving/counter attack forces attacking the Confederate forces moving up to assault the fort led by Pete, Tony and later Dave.
Dave supplied the figures and terrain for board 1.
Board 2 saw Gaz's Confederate brigades assaulting the Fort 69 commanded by me. Terrain by Dave with my figures.
Fun game. We had to tweak the scenario as we played as ways were found to get round the scenario constraints. One tweak was a late additional brigade for Gaz as he had to turn one around to face the Union relief force that had won the race quite early on in the game.
I thought the Glory Hallelujah rule additions added period flavour and played well. I need to check the forums on some of the rules affecting charging as I'm not sure I played them right. It was great to play with my ACW figures, their last outing under my generalship was in the early 1990s!
The scenario saw the Confederates tasked with taking a Union fort. We used the Black Powder rules with the Glory Hallelujah amendments.
Board 1 saw Mel, and Ian command the Union relieving/counter attack forces attacking the Confederate forces moving up to assault the fort led by Pete, Tony and later Dave.
Dave supplied the figures and terrain for board 1.
Board 2 saw Gaz's Confederate brigades assaulting the Fort 69 commanded by me. Terrain by Dave with my figures.
 |
| Gaz's 2 brigades |
 |
| The fort. Defended by a Union brigade |
 |
| Board 2 |
 |
| Board 1 |
 |
| Confederates on board 2 racing towards the fort |
 |
| Confederates still racing forward |
 |
| The Union consolidate in the town |
 |
| A Union brigade reaches the road to cross on to board 2 |
 |
| Gaz's reinforcements arrive just in time to cover the road |
 |
| The Confederate assault goes in! |
 |
| The Union march on to Board 2 and discover a cannon aimed right at them! |
 |
| The Confederates continue to march up the board |
 |
| The Union move to block them |
 |
| Ian's Union brigade attempting to force their way on to board 2 |
 |
| This does not end well for the Union |
 |
| Gaz's first brigade to attack gets mauled but pushes the Union defenders back |
 |
| The remains of Gaz's 1st brigade on the left and a fresh brigade reaches the northern ramparts. |
 |
| The Union under pressure, but the artillery doing it's job. I'd positioned the terrain so that the outer defence was in short range betting that attackers wouldn't have enough moves to cross. |
 |
| The destroyed valiant 1st brigade |
I thought the Glory Hallelujah rule additions added period flavour and played well. I need to check the forums on some of the rules affecting charging as I'm not sure I played them right. It was great to play with my ACW figures, their last outing under my generalship was in the early 1990s!


